
TL;DR:
- A home is solar ready when its roof, electrical system, and available space meet technical standards for safe and efficient installation. Preparing includes inspecting roof age, orientation, shading, electrical panel capacity, and usable space to ensure optimal performance and compliance. Proper assessments prevent costly upgrades, optimize system size, and facilitate a smooth installation process.
A home is solar ready when its roof, electrical system, and available space meet the physical and technical standards required for a safe, efficient solar installation. These solar installation indicators are not abstract. They are measurable checkpoints you can evaluate before calling a contractor. The industry term for this process is a solar site assessment, and it covers everything from shingle age to panel capacity. Knowing the signs your home is solar ready puts you in control of the decision and the timeline.
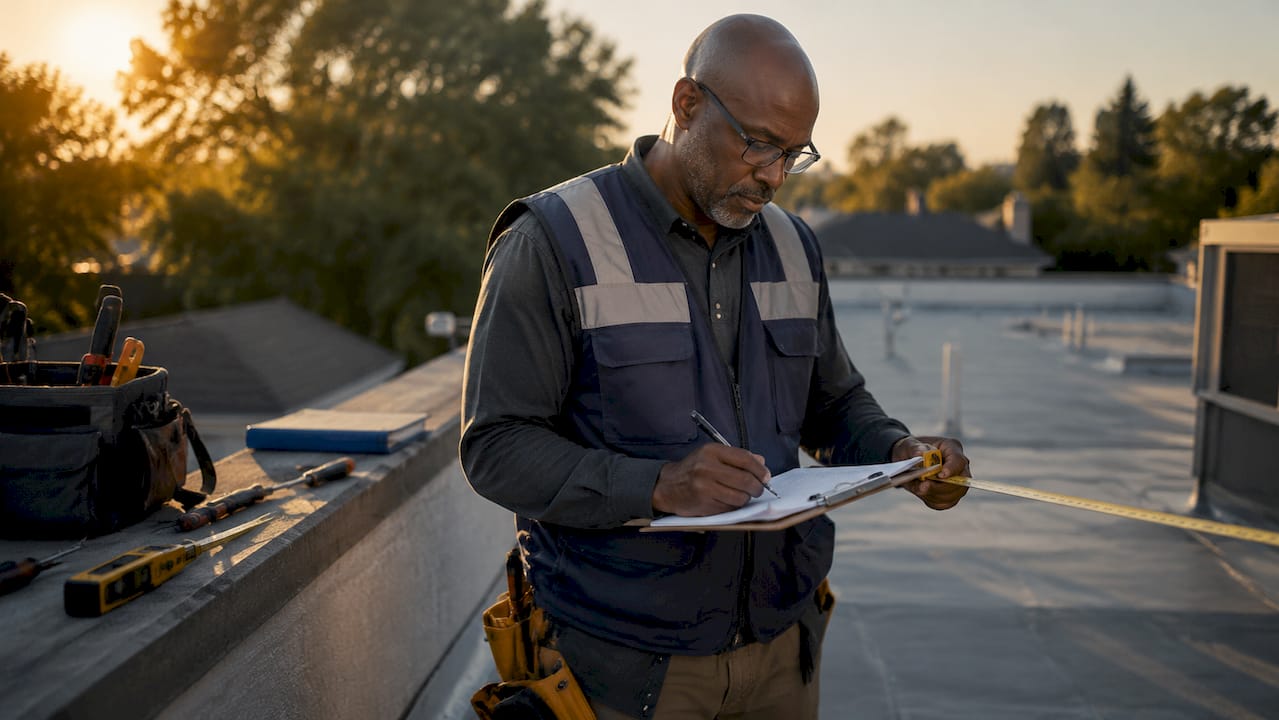
1. Signs your home is solar ready start with roof age and condition
Your roof is the foundation of any solar installation. Solar panels last 25–30 years, so your roof needs to outlast the system or come close. A roof with fewer than 10 years of remaining life creates a costly problem: you will need to remove and reinstall the panels when the roof fails.
Solar panel readiness signs on the roof include:
- Shingle condition: Curling, cracking, or missing shingles signal a roof near the end of its life.
- Decking integrity: Soft spots or sagging indicate structural damage that must be repaired before any load is added.
- Flashing and seals: Deteriorated flashing around chimneys or vents creates leak risk once panels are mounted.
- Age: Most asphalt shingle roofs last 20–25 years. A roof older than 15 years warrants a professional inspection before solar planning.
Solar panels add 3–5 pounds per square foot of load to a roof structure. Most modern roofs handle this without structural changes, but older or damaged decking may not.
Pro Tip: If your roof needs replacement within five years, bundle it with your solar installation. Doing both at once saves you the cost of a second panel removal and reinstallation later.
2. Roof orientation and pitch determine your energy output
Roof direction and angle directly control how much sunlight your panels capture. South-facing roofs with a pitch between 15° and 40° produce the highest output in the Northern Hemisphere. That orientation maximizes sun exposure across the full day. East and west-facing roofs are still viable, producing roughly 80–90% of the output of a south-facing system.
| Roof Orientation | Relative Output | Best Use Case |
|---|---|---|
| South-facing | 100% (baseline) | Ideal for all system sizes |
| East or west-facing | 80–90% of south | Viable with proper sizing |
| North-facing | Significantly reduced | Generally not recommended |
| Flat roof | Adjustable with racking | Can be tilted to optimal angle |
Flat roofs are not a barrier. Adjustable racking systems tilt panels to the correct angle, and the open space often allows for larger arrays than pitched roofs permit.
Pro Tip: Use Google’s Project Sunroof or a local solar site assessment to map your roof’s actual sun hours before committing to a system size. Florida averages among the highest peak sun hours in the country, which changes the math significantly.
3. Shading from trees or structures limits solar production
Shading is one of the most underestimated factors in a home solar assessment. A single tree branch crossing one panel can reduce output across an entire string of panels in a traditional system. Microinverters and power optimizers solve this by allowing each panel to operate independently. That means partial shading no longer kills the whole system’s performance.
Walk your roof line at different times of day and note what casts shadows. Chimneys, dormers, neighboring buildings, and deciduous trees all create shading patterns that shift with the seasons. A professional site assessment maps these shadows across the full year, not just on a clear afternoon in june.
If heavy shading covers more than 30% of your usable roof area year-round, the financial case for solar weakens considerably. Trimming trees is often the most cost-effective fix before installation.
4. Your electrical panel capacity must support solar integration
The electrical panel is the checkpoint most homeowners overlook. A 200-amp panel is the standard minimum for solar compatibility. Older homes with 100-amp service almost always require an upgrade before a solar system can be safely connected.
Key electrical readiness indicators include:
- Panel amperage: Confirm your main breaker rating. A 100-amp panel cannot safely carry both household loads and solar backfeed.
- Available breaker slots: Solar requires a dedicated breaker. A full panel needs a tandem breaker or a subpanel.
- Grounding system: Proper grounding is required by the National Electrical Code for solar interconnection. A licensed electrician must verify this before installation.
- Wiring condition: Aluminum branch wiring common in homes built between 1965 and 1973 requires specific connectors and inspection.
Certain older panel brands including Federal Pacific and Zinsco carry documented fire hazards and active safety recalls. These panels must be replaced before solar installation, regardless of roof condition or system size. This is not a negotiable item. Understanding how electricians support home sustainability upgrades helps clarify why panel work is a prerequisite, not an afterthought.
5. Available roof space determines your system size
A solar system needs room to generate meaningful output. Solar-ready homes allocate at least 200 square feet of unobstructed, unshaded roof space. A typical residential system requires 300–400 square feet to produce enough power to offset a significant portion of household consumption.
Common obstacles that reduce usable roof area include:
- Chimneys and flue vents require setback clearance on all sides per fire code.
- Skylights cannot be covered and create gaps in panel layout.
- HVAC equipment mounted on the roof blocks panel placement and access paths.
- Roof valleys where two planes meet cannot hold panels and interrupt usable sections.
- Low-slope sections adjacent to walls may not meet fire code setback requirements.
Measure your usable roof sections and subtract these obstructions before estimating system size. A 2,000-square-foot home with a complex roofline may have less usable space than a 1,400-square-foot home with a simple gable roof.
6. Your energy bills reveal whether solar makes financial sense
High electricity costs are a direct solar installation indicator. Homeowners paying above $0.15 per kWh with monthly bills over $150 see the strongest financial return from solar. That threshold matters because solar’s payback period shortens as your baseline electricity cost rises.
Pull your last 12 months of utility bills and calculate your average monthly consumption in kilowatt-hours. This number drives system sizing. A system sized to your actual usage avoids both under-production and unnecessary cost. Florida homeowners can review the solar savings checklist to align system size with real consumption data.
If you plan to add an electric vehicle, a heat pump, or an induction range within the next few years, size your system for that future load now. Retrofitting a larger system later costs more than building in capacity upfront.
7. Future electrification plans affect your system design today
Solar feasibility assessment includes evaluating future electrification plans, not just current usage. EV charging alone can add 200–400 kWh per month to your household load. That changes your system size, your battery storage needs, and your panel count.
A home that is solar ready today but planning major electrification upgrades in two years needs a system designed for tomorrow’s load profile. Discuss planned changes with your solar consultant before finalizing system design. The financial case for home solar in Florida shifts significantly when EV charging and appliance electrification are factored into the load analysis.
8. HOA rules and local permits affect installation feasibility
Homeowners association rules and local zoning codes are practical solar panel readiness signs that many homeowners miss until late in the process. Florida law limits HOA restrictions on solar installations, but HOAs can still regulate panel placement, color, and visibility from the street.
Check your HOA covenants before signing a solar contract. Most HOAs must respond to a solar installation request within a defined period, and denial must be based on specific criteria. Local building departments also require permits, structural engineering sign-off, and utility interconnection approval. These steps add time to your project timeline. Building them into your planning prevents delays.
9. Preparing your home for solar: practical next steps
Preparing your home for solar is a process, not a single decision. Start with a professional home energy efficiency audit to identify consumption patterns and inefficiencies. Reducing your baseline load before sizing a solar system means you need fewer panels to achieve the same offset.
Steps to take before installation:
- Get a roof inspection from a licensed roofer, not a solar salesperson.
- Schedule an electrical panel assessment with a licensed electrician to confirm amperage and grounding.
- Gather 12 months of utility bills to establish your actual consumption baseline.
- Research available incentives including the federal 30% Investment Tax Credit, which applies to residential solar installations.
- Consult a solar feasibility expert who can model your system’s output, payback period, and financing options before you commit.
Solar readiness aligns verified energy use with future electrification plans and grid interconnection requirements. Skipping any of these steps creates gaps that show up as cost overruns or underperforming systems after installation.
Key takeaways
A home is solar ready when its roof, electrical panel, available space, and energy consumption all meet the technical thresholds required for a safe and financially sound installation.
| Point | Details |
|---|---|
| Roof age and condition | The roof needs at least 10 years of remaining life to align with a 25–30 year solar system. |
| Electrical panel capacity | A 200-amp panel is the standard minimum; Federal Pacific and Zinsco panels must be replaced first. |
| Roof orientation and pitch | South-facing roofs at 15°–40° pitch produce peak output; east and west orientations remain viable. |
| Available roof space | Plan for at least 200–400 square feet of unobstructed space to support a meaningful system size. |
| Energy usage and future loads | Size your system against 12 months of actual bills and any planned EV or appliance electrification. |
What Solar Energy Management has learned from real assessments
After more than 20 years of solar consulting in Florida, the pattern I see most often is this: homeowners focus on the roof and ignore the electrical panel. That oversight is expensive. A roof inspection takes a few hundred dollars and a few hours. An electrical panel upgrade can run $1,500–$3,000 and add weeks to a project timeline if it is not planned from the start.
The second thing I see consistently is homeowners sizing their system for today’s load without accounting for what they plan to plug in next year. An EV charger, a pool heat pump, or a whole-home generator changes the load profile dramatically. A system sized too small in year one becomes a source of frustration by year three.
The most successful solar projects I have worked on share one characteristic: the homeowner treated the assessment phase as seriously as the installation phase. They got a roof inspection, an electrical evaluation, and a 12-month energy analysis before talking to a single installer. That preparation compresses the installation timeline, eliminates surprise costs, and produces a system that actually performs as modeled.
Solar readiness is not a checklist you hand to a contractor. It is a structured evaluation of your property’s physical condition, electrical infrastructure, energy patterns, and financial goals. When all four align, the installation goes smoothly and the return on investment follows the projection.
— Solar Energy Management
Solar Energy Management can assess your home’s readiness today
Solar Energy Management brings over 20 years of Florida-specific solar consulting experience to every home assessment. The team evaluates roof condition, electrical panel capacity, shading patterns, and energy consumption to give you a clear picture of your property’s solar potential before you spend a dollar on installation.
Whether you need a full home energy solutions review or a targeted solar system design consultation, Solar Energy Management provides independent guidance with no installer bias. The firm’s financial modeling covers the federal 30% Investment Tax Credit, utility rate projections, and payback timelines specific to your Florida location. Contact Solar Energy Management to schedule your property assessment and get a clear, honest picture of what solar can deliver for your home.
FAQ
How do I know if my roof is solar ready?
A solar-ready roof has at least 10 years of remaining life, no significant structural damage, and a south, east, or west-facing orientation with a pitch between 15° and 40°. A licensed roofer’s inspection confirms these factors before installation begins.
What electrical panel do I need for solar?
A 200-amp electrical panel is the standard minimum for residential solar installation. Homes with 100-amp service or older Federal Pacific and Zinsco panels require upgrades before a solar system can be safely connected.
How much roof space does a solar system need?
A typical residential solar system requires 300–400 square feet of unobstructed, unshaded roof space. The Department of Energy identifies 200 square feet as the minimum threshold for a solar-ready home.
Does shading disqualify my home from solar?
Partial shading does not disqualify a home. Microinverters and power optimizers allow each panel to operate independently, reducing the impact of shading from trees or chimneys on overall system output.
What is the first step in preparing my home for solar?
Start with a professional home energy audit and a roof inspection. These two assessments establish your consumption baseline and confirm your roof’s structural readiness, which together determine the correct system size and installation timeline.
Recommended
- Solar And Roof: Your Guide To Florida Installations – Commercial + Residential Solar Power Florida
- How Residential Solar Works: A Homeowner’s Guide – Commercial + Residential Solar Power Florida
- Florida Electric And Solar: A Homeowner’s And Business Guide – Commercial + Residential Solar Power Florida
- Residential Solar Energy Florida A 2026 Homeowners Guide – Commercial + Residential Solar Power Florida


