
TL;DR:
- Installing residential solar involves evaluating roof condition, electrical capacity, and obtaining necessary permits. The process takes two to six months, with most delays caused by bureaucracy rather than physical installation. Maximizing savings depends more on net metering policies and thoughtful system sizing than on the federal tax credit alone.
Residential solar panel installation is the process of mounting photovoltaic (PV) panels on your home, connecting them to an inverter, and linking that system to your electrical panel and utility grid. Done correctly, it reduces your electricity bills, increases your property value, and qualifies you for the federal 30% Investment Tax Credit (ITC). This solar panel installation home guide covers every phase from roof assessment through Permission to Operate, with real cost figures, timeline expectations, and the pitfalls that catch most homeowners off guard. Solar Energy Management has spent over 20 years helping Florida homeowners navigate this process, and the details here reflect what actually happens on the ground.
What are the prerequisites for installing solar panels at home?
The foundation of any successful home solar panel setup is a thorough pre-installation assessment. Skipping this step is the single most common reason projects go over budget or stall mid-installation.

Roof condition and lifespan
Solar panels last 25–30 years, so your roof needs to match that commitment. Installers recommend at least 10 years of remaining roof life before mounting any equipment. Installing on an aging roof means you will pay to remove and reinstall the entire system when the roof eventually needs replacement. That cost can easily exceed $3,000 to $5,000 for a standard residential system. Check your roof’s age, material condition, and any signs of sagging or water damage before you sign anything. A structural roof evaluation confirms whether your roof can bear the added load of mounting hardware and panels.
Electrical panel and shading review
Your electrical panel must have sufficient capacity to handle the solar system output plus your existing loads. Many older homes run 100-amp panels, and upgrading to 200 amps is a common prerequisite that adds $1,500–$3,000 to project costs. Shading from trees, chimneys, or neighboring structures directly reduces energy output. A south-facing roof with minimal shading between 9:00 AM and 3:00 PM produces the most power in the continental United States. Use the solar readiness checklist from Solar Energy Management to evaluate your home before contacting installers.
Permits, HOA approvals, and equipment overview
Every residential solar installation requires local building permits and, in many cases, HOA approval. Utility interconnection agreements are also mandatory before your system can feed power back to the grid. The core equipment list for a standard grid-tied system includes:
- PV panels: monocrystalline or polycrystalline modules rated by wattage
- Inverter: string inverter, microinverters, or power optimizers
- Mounting hardware: racking systems rated for your roof type and local wind loads
- Disconnect switches and conduit: required by the National Electrical Code (NEC)
- Monitoring system: tracks real-time and historical production data
Pro Tip: Request your installer’s roof evaluation report in writing before signing a contract. If they skip this step, that is a red flag about their process quality.
What are the step-by-step installation phases and typical timeline?
Residential solar projects take 2 to 6 months from contract signing to Permission to Operate (PTO). Only about 25% of projects finish within 3 months. Understanding why helps you plan realistically.
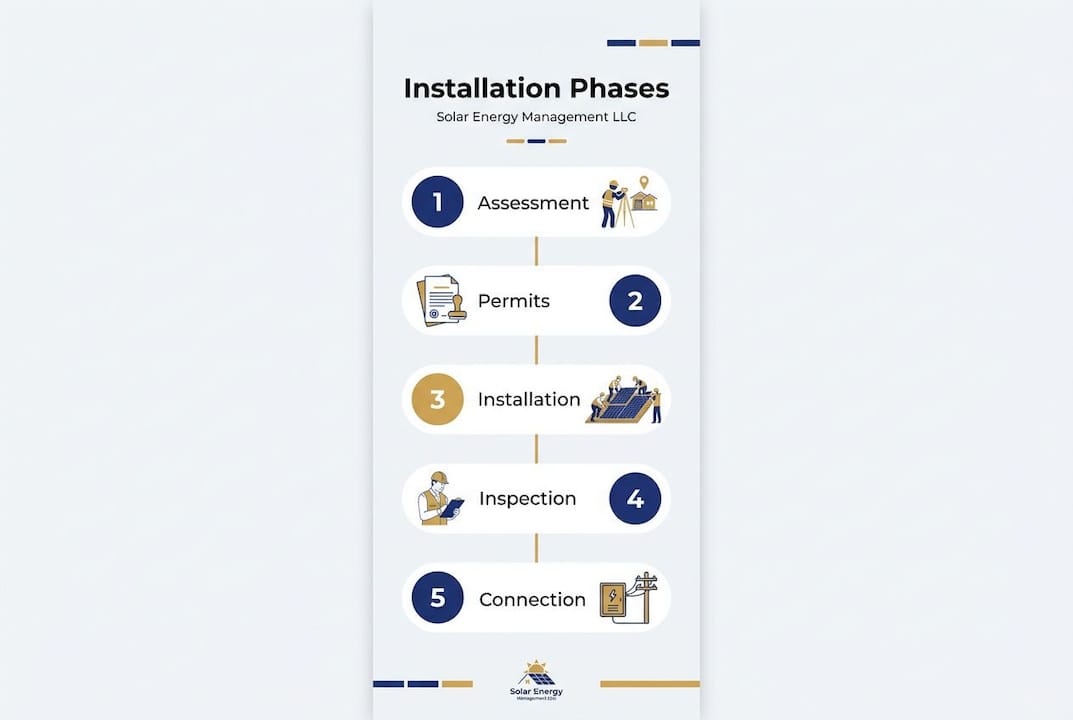
The seven phases of a residential solar installation
Site assessment and contract signing. An engineer or certified installer evaluates your roof, shading, electrical panel, and energy usage. You receive a system design proposal and sign a contract.
Engineering, design, and permit application. The installer creates stamped engineering drawings and submits permit applications to your local building department. This phase typically takes 1–3 weeks.
Permit review and approval. Standard permit offices take 1–6 weeks. Jurisdictions using SolarAPP+ can issue same-day or instant approvals for code-compliant designs. Over 800 jurisdictions have adopted SolarAPP+ as of 2026. That adoption rate means faster approvals are becoming the norm in progressive markets.
Equipment procurement and scheduling. Your installer orders panels, inverters, and hardware. Lead times vary by manufacturer and supply chain conditions.
Physical installation. Crews mount racking, attach panels, run conduit, and connect the inverter. Physical installation takes only 1–3 days for most residential systems. The work itself is rarely the bottleneck.
Electrical inspection. A city or county inspector verifies the installation meets NEC requirements and local code. Scheduling this inspection can take 1–3 weeks depending on your jurisdiction.
Utility interconnection and PTO. Your utility reviews the interconnection application and issues Permission to Operate. This step takes 2–8 weeks and is the most variable phase of the entire process.
| Phase | Typical Duration |
|---|---|
| Permit review and approval | 1–6 weeks |
| Physical installation | 1–3 days |
| Electrical inspection | 1–3 weeks |
| Utility interconnection and PTO | 2–8 weeks |
The largest timeline bottlenecks are permit office backlogs and utility interconnection queues, not the installation crew. Choosing an installer with documented experience in your specific utility territory cuts weeks off the process.
Pro Tip: Ask your installer how many projects they have completed with your specific utility. Installers who submit interconnection applications regularly know the utility’s preferred documentation format, which reduces back-and-forth delays.
How to estimate costs, incentives, and long-term benefits
The financial case for residential solar is strong in 2026, but the numbers vary significantly by location, system size, and utility policy.
Cost breakdown before and after the federal ITC
Installed residential solar costs range from $2.80 to $3.80 per watt before applying the federal 30% ITC. After the credit, effective costs drop to $1.96–$2.66 per watt. For an 8 kW system, that means a pre-credit cost of $22,400–$30,400, falling to $15,680–$21,280 after the ITC. Most U.S. homes install systems between 6 kW and 12 kW depending on annual energy consumption.
The federal ITC is claimed in the tax year when your system receives Permission to Operate and begins generating power, not when you sign the contract. If your PTO arrives in january of the following year, the credit shifts to that tax year. Plan your project timeline with this in mind if you are targeting a specific tax year.
Payback periods and property value
Payback periods range from 8 to 16 years depending on your state’s electricity rates and net metering policies. Homes in high-rate states like California, Hawaii, or Massachusetts see payback in 8–11 years. Lower-rate states may see 12–16 years. Solar systems also increase property values by 5–10%, which is a financial benefit that does not depend on your electricity bill at all.
Net metering policy is the most critical factor influencing your actual savings, more so than the federal tax credit. A generous net metering policy credits you at the full retail rate for every kilowatt-hour you export to the grid. A less favorable policy credits you at a lower wholesale rate. Florida homeowners should review current net metering rules carefully. Solar Energy Management provides a detailed breakdown of Florida net metering rules and how they affect your return.
Additional incentives most homeowners miss
Utility-specific rebates from cooperatives and municipal utilities often amount to $200–$1,000 per installed kilowatt but are rarely advertised. Ask your installer and your utility directly during the proposal phase. State-level programs, property tax exemptions on added home value, and sales tax exemptions on equipment purchases also vary by state and can meaningfully reduce your net cost.
- Federal 30% ITC: applies to equipment and installation labor
- State tax credits: vary by state; check your state energy office
- Utility rebates: $200–$1,000 per kW from cooperatives and municipal utilities
- Property tax exemption: many states exempt solar-added home value from property tax assessment
- Sales tax exemption: several states exempt solar equipment from sales tax
What are common mistakes to avoid in home solar installation?
Most installation problems are preventable with upfront diligence. The mistakes below account for the majority of cost overruns and performance shortfalls Solar Energy Management sees in the field.
- Installing on an aging roof. A roof with less than 10 years of life remaining will force a costly system removal and reinstallation. Assess roof condition before you get solar quotes.
- Skipping a shading analysis. Even partial shading on one panel can reduce output across a string inverter system. If your roof has shading challenges, microinverters or DC power optimizers are the correct technical solution.
- Choosing an installer without a production warranty. Reputable installers guarantee a specific annual kilowatt-hour output. If the system underperforms, they are contractually obligated to address it.
- Ignoring future energy needs. Homeowners who plan for future loads like electric vehicle (EV) charging or heat pumps get better long-term ROI by sizing their system correctly from the start. Adding capacity later costs more than sizing up initially.
- Failing to monitor system performance. The DOE recommends third-party performance verification at startup and after one year to confirm output meets design estimates. Use your monitoring app to track daily production and flag any unexpected drops.
Pro Tip: Before signing a contract, ask the installer for three references from projects completed in your specific county. Local permit and utility experience is not transferable across jurisdictions.
Key Takeaways
A successful residential solar installation depends on roof readiness, realistic timeline expectations, and understanding that net metering policy, not just the federal ITC, determines your actual financial return.
| Point | Details |
|---|---|
| Roof condition is non-negotiable | Confirm at least 10 years of remaining roof life before installation to avoid costly removal and reinstallation. |
| Timeline is mostly bureaucratic | Physical installation takes 1–3 days; permits and utility approval take 2–8 weeks each. |
| Net metering drives savings | Net metering policy has more impact on payback period than the federal 30% ITC in most states. |
| ITC timing follows PTO | Claim the 30% federal tax credit in the tax year your system receives Permission to Operate, not at contract signing. |
| Size for future loads | Include EV charging or heat pump capacity in your initial system design to maximize long-term ROI. |
What I have learned after 20 years of solar installations in Florida
Florida homeowners consistently underestimate how much of the solar installation process is outside the installer’s control. The physical work is fast. The paperwork is not. Permit offices, HOA review boards, and utility interconnection queues operate on their own schedules, and no installer can guarantee those timelines regardless of how experienced they are.
The homeowners who have the best experiences are the ones who complete a thorough roof and electrical panel assessment before they ever request a quote. They know their roof age, their panel capacity, and their average monthly kilowatt-hour usage. That preparation eliminates the most common source of mid-project surprises and change orders.
The second thing I consistently see overlooked is future-proofing. A homeowner who installs a system sized only for today’s usage and then buys an EV two years later is looking at a second project, second permit, and second interconnection application. Sizing for anticipated loads upfront is always the better financial decision.
Finally, get multiple quotes and compare them on production guarantees, not just price per watt. The cheapest installer who cannot tell you their projected annual kilowatt-hour output is not actually giving you a real quote. A well-designed residential system with a verified production estimate is worth more than a low price with no accountability.
— Solar Energy Management
How Solar Energy Management supports your solar installation
Solar Energy Management brings over 20 years of Florida-specific experience to every residential solar project. The firm’s independent consulting model means you receive unbiased guidance on system sizing, equipment selection, and financial modeling before you commit to any installer.

Solar Energy Management’s process starts with a complimentary site assessment covering roof condition, shading analysis, electrical panel capacity, and your current energy usage. From there, the team builds a financial model that accounts for the federal 30% ITC, Florida net metering rules, and any available utility rebates. Whether you are evaluating your first system or planning an upgrade that includes battery storage for solar, Solar Energy Management provides the technical and financial clarity you need to make a confident decision. Explore your residential energy solutions with Solar Energy Management today.
FAQ
How long does a residential solar installation take?
Most residential solar projects take 2 to 6 months from contract signing to Permission to Operate. Physical installation takes only 1–3 days; permits and utility approval account for the majority of the timeline.
When can I claim the federal 30% solar tax credit?
You claim the ITC in the tax year your system receives Permission to Operate and begins generating power. If PTO arrives after December 31, the credit applies to the following tax year.
What size solar system does a typical home need?
Most U.S. homes install systems between 6 kW and 12 kW depending on annual energy consumption. If you plan to add EV charging or a heat pump, size your system to cover those future loads from the start.
Does my roof need to be replaced before going solar?
Your roof needs at least 10 years of remaining lifespan before installation. Installing on an aging roof leads to costly system removal and reinstallation when the roof eventually needs replacement.
What is the payback period for home solar panels?
Payback periods range from 8 to 16 years depending on your state’s electricity rates and net metering policy. High-rate states typically see payback in 8–11 years; lower-rate states may see 12–16 years.
Recommended
- How To Install Rooftop Solar Panels A Florida Guide – Commercial + Residential Solar Power Florida
- Signs Your Home Is Solar Ready: A Homeowner’s Guide – Commercial + Residential Solar Power Florida
- Solar Flat Roof Mounting: A Florida Property Owner’s Guide – Commercial + Residential Solar Power Florida
- How Residential Solar Works: A Homeowner’s Guide – Commercial + Residential Solar Power Florida


